RealTimeQuery online help
|
Linksys BEFSR41 - EtherFast® Cable/DSL Router with 4-Port
Switch
For your convenience, use the Router’s web-based utility to administer it. To access the web-based utility of the Router, launch Internet Explorer or Netscape Navigator, and enter the Router’s default IP address, in the Address field. A password request page, will pop up. Leave the User Name field blank, and enter admin in the Password field. Then click the OK button. 1). Click on the DHCP tab at the top:  2). Then click on the button labelled 'DHCP Clients Table', this page will pop up: 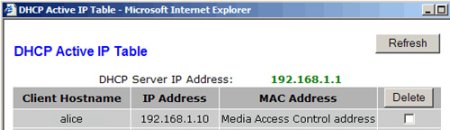 Look in the Client Hostname column, find your computer name and memorize the last three numbers of the IP address to the right of it. In this example the client hostname is "alice", and the last three numbers of the IP address are 10. Once you've got those three numbers memorized then close the window. 3). Click on the orange colored tab labelled 'Advanced', click on the second tab along labelled 'Forwarding' and fill out the details as is shown below. Enter the port used by RealTimeQuery (by default 7220) in the column "Service Ports". Also you need to enter the last IP numbers you have memorized. 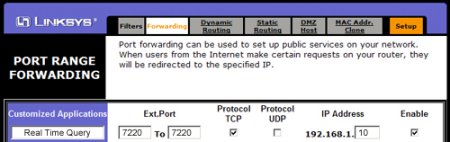 At the bottom click on 'Apply' to save the settings you just typed in. Now your router is setup to forward incoming traffic to ports 7220 on your computer. |